

Post by EmilyBuff on Aug 5, 2014 21:35:11 GMT -6
Originally posted on the old HH board by Idiotic. Rescued from Google cache.
this is a wig i completed over three days, so y'all get treated to seeing how much my nail polish chipped during that time...
you will need:
-1 synthetic fibre wig - i usually get mine from eBay but costume or joke shops have them, too. if you pay a little more you'l get more hair on the wig base, which is a good thing. i pay anything from £7 up to £30 depending on what i need. you can't guarantee that the fibre will seal well on all synthetic wigs, but i've never had too much of a problem
- 2-4 bags of KK jumbobraid for dreading
- mix of foam/plastics if desired
- needle and thread or cable ties
- scissors
pick your colours and decide what's going to go with the base colour of the wig. if you just want a wig in a solid colour, only use KK that matches the base wig.
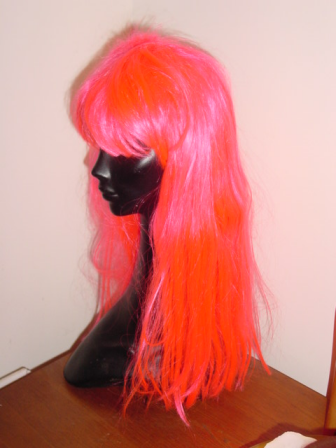
so, here is your wig. isn't it just lovely:
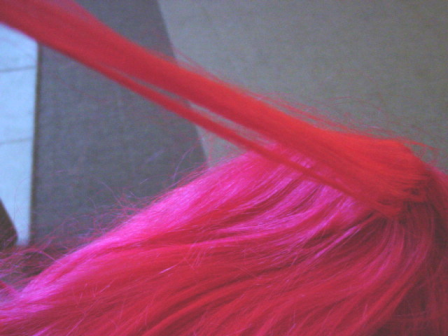
i usually work on a table top with everything i need to hand. lay the wig flat on the table and start by taking a section of hair from the front at the top. an inch or so is usually fine, more if you want thicker dreads etc:
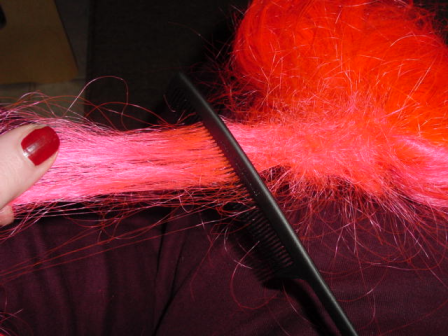
backcomb the section. it's easier than making single dreads as the section is already attached to something so there's no foot holding or hangers involved!
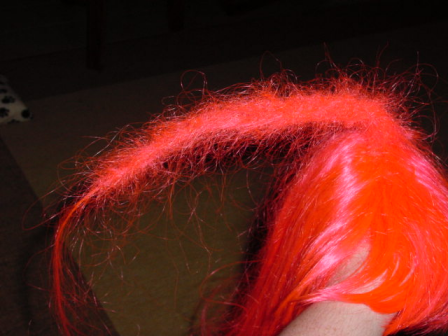
finished and backcombed section:
continue on around the wig until you've dreaded all you need to. you can either dread all the wig (i will usually leave the fringe loose) or only dread sections, leaving some loose hair inbetween. i prefer having bits of loose hair as it adds to the completed wig's texture.
the wig now looks like this:
i usually take a minute now to trim the wig into the sort of shape i'm after. so, if i'm going for an a-line wig (as i am here) i'll chop it into a rough a-line to give me a shape to work towards. i LOVE how the wig looks at this stage and always kinda want to keep it that way!
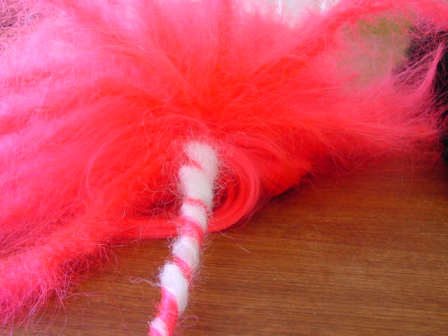
now we're going to add onto the wig. lightly backcomb some KK jumbo. take a backcombed section, poke a hole in the very base of the section with your finger and thread through the backcombed hair:
fold the new hair back over onto itself so it forms its own little backcombed section:

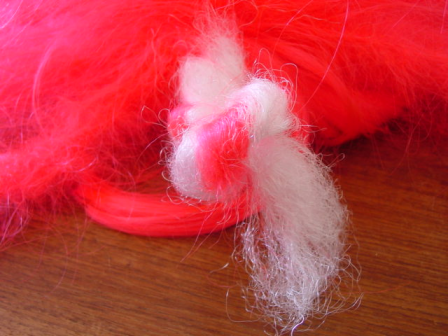
grab both it and the original section on the wig and twist together. keep twisting until you've got the shape of the dread you want:
i then loosely tie the dread into a knot to keep it out of the way til i've done the whole head:
carry on until you've added hair to all of the sections you wish to. you don't have to add hair to all sections but it helps provide coverage for the wig base if you make your dreads fairly chunky this way. here's all the bits knotted up:

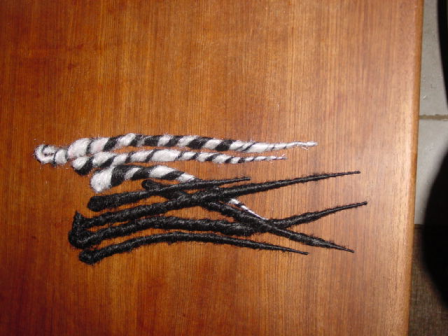
you're ready to steam/handroll/whatever your dreads. unknot one dread and make sure you get any flyaway bits for that section tucked back into the dread. twist and steam, continue for all sections. here's halfway through:
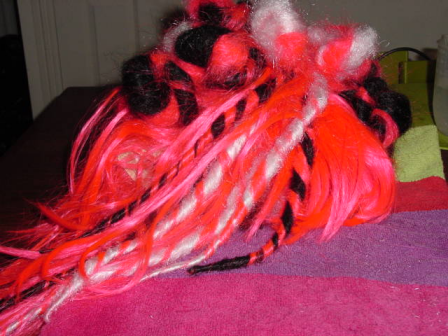
all steamed! this will do fine, you can leave it here if you like as you should have pretty good coverage and a good-looking dread wig:
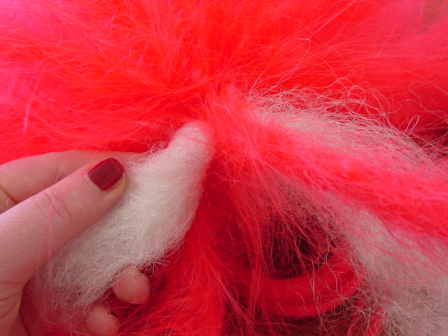
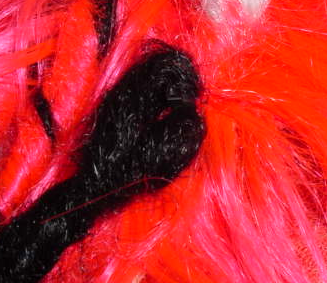
however, i like to make some SEDs to attach to the wig to add some more of the accent colours. this also helps provide coverage at the back of the wig, where the hair is always thinner. you can use DEDs too, i used to but find that SEDs work better for me. DEDs work best if you're making a solid colour wig. some of the ones i used on this wig:
the brilliant thing about wig bases is that they're made of mesh, that you can sew/attach/knot all kinds of stuff into:
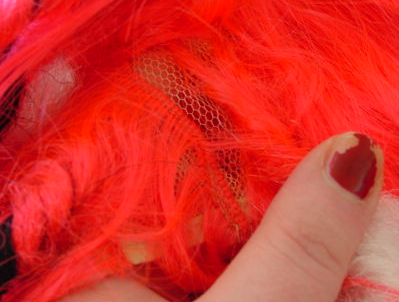
*tuts over state of nails*
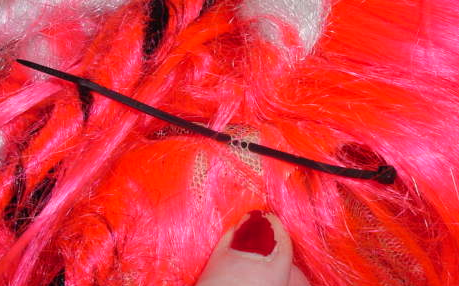
attaching dreads - i used to sew my dreads onto the wig base. you can use rubber bands by rubber-banding new dreads onto either the loose hair or existing dreads. rubber bands are faster than sewing, but i don't believe they look as neat, lie as well or last as long. sewing is nice and secure but takes longer. but now i'm a TOTAL convert to cable ties. i buy them in discount stores, they are super fast and probably the most secure method of attaching stuff to a wig base.
so, thread a cable tie through the wig base mesh:
thread the SED onto the cable tie, loop up the cable tie:
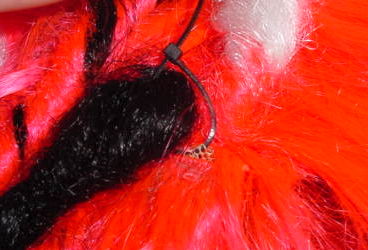
pull cable tie tight and snip off the end:
done! carry on with all your dreads. i hold up the wig inbetween attaching dreads to make sure i'm getting the colours fairly even or covering up any thinner parts of the overall wig. it usually involves lots of squinting and will probably give me wrinkles.
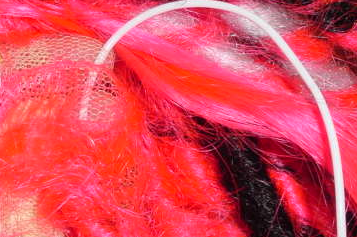
you can also poke plastics/ribbons etc through the mesh and knot them off:
ta-daa! you now have a wig with a good thick coverage of dreads plus a few accents for interest. tidy up the fringe and loose hair, snip off a few scraggly ends and you should be done:
but i like to add a few foam and plastic bits'n'bobs to the back of a-lines just to emphasise the shape.
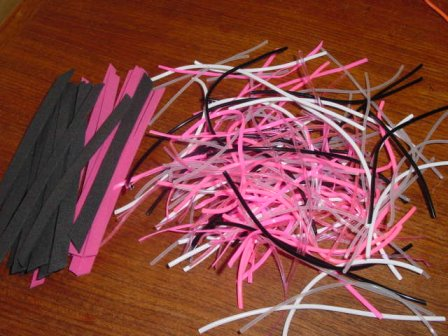
get a few strips of foam and short lengths of plastic/rexlace/tubing together:
i then attach these in bundles to the back of the wig in exactly the same method that i use for dreads using cable ties, except i don't snip off the end of the cable tie itself, as it provides a lovely spikey bit!
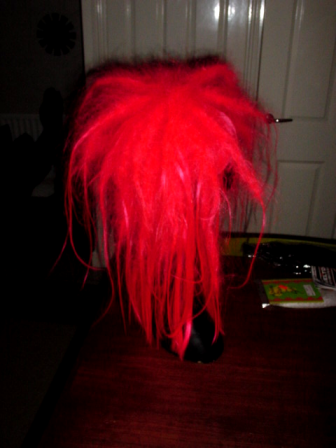
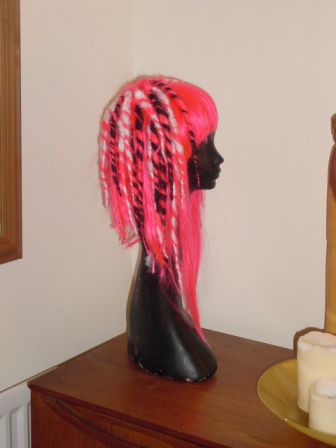
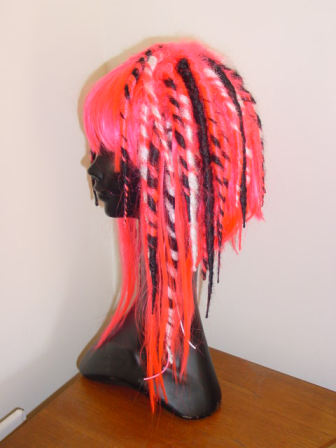
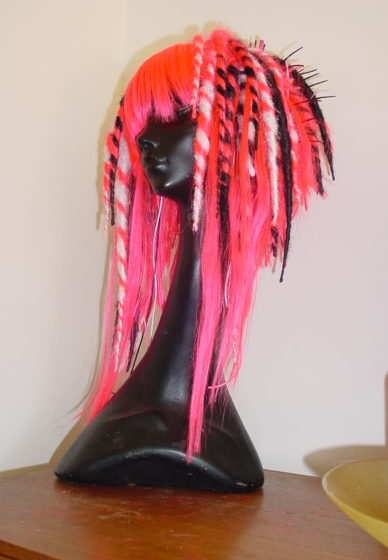
so this is my finished piece:
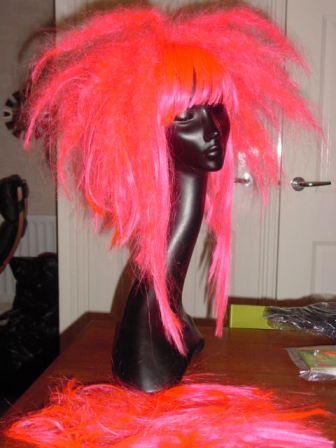
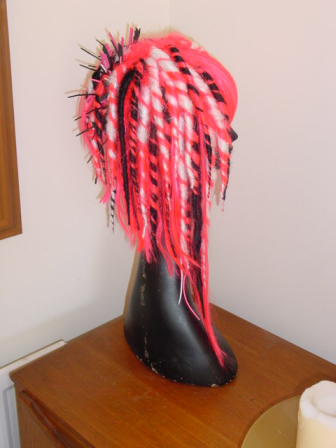
side:
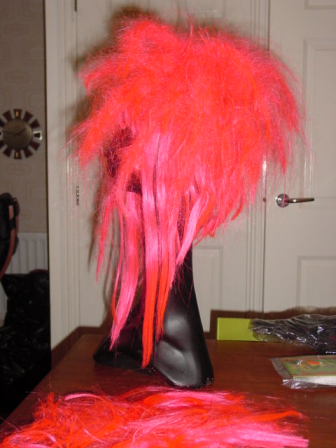
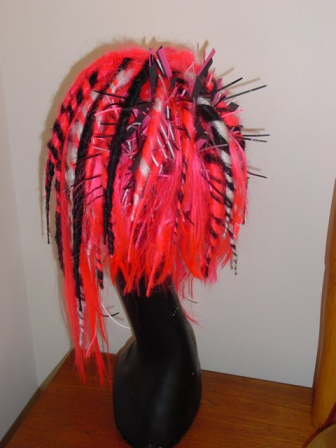
back showing foam etc better:
hope you all give it a go and post pics in the wig forum
this is a wig i completed over three days, so y'all get treated to seeing how much my nail polish chipped during that time...
you will need:
-1 synthetic fibre wig - i usually get mine from eBay but costume or joke shops have them, too. if you pay a little more you'l get more hair on the wig base, which is a good thing. i pay anything from £7 up to £30 depending on what i need. you can't guarantee that the fibre will seal well on all synthetic wigs, but i've never had too much of a problem
- 2-4 bags of KK jumbobraid for dreading
- mix of foam/plastics if desired
- needle and thread or cable ties
- scissors
pick your colours and decide what's going to go with the base colour of the wig. if you just want a wig in a solid colour, only use KK that matches the base wig.
so, here is your wig. isn't it just lovely:
i usually work on a table top with everything i need to hand. lay the wig flat on the table and start by taking a section of hair from the front at the top. an inch or so is usually fine, more if you want thicker dreads etc:
backcomb the section. it's easier than making single dreads as the section is already attached to something so there's no foot holding or hangers involved!
finished and backcombed section:
continue on around the wig until you've dreaded all you need to. you can either dread all the wig (i will usually leave the fringe loose) or only dread sections, leaving some loose hair inbetween. i prefer having bits of loose hair as it adds to the completed wig's texture.
the wig now looks like this:
i usually take a minute now to trim the wig into the sort of shape i'm after. so, if i'm going for an a-line wig (as i am here) i'll chop it into a rough a-line to give me a shape to work towards. i LOVE how the wig looks at this stage and always kinda want to keep it that way!
now we're going to add onto the wig. lightly backcomb some KK jumbo. take a backcombed section, poke a hole in the very base of the section with your finger and thread through the backcombed hair:
fold the new hair back over onto itself so it forms its own little backcombed section:
grab both it and the original section on the wig and twist together. keep twisting until you've got the shape of the dread you want:
i then loosely tie the dread into a knot to keep it out of the way til i've done the whole head:
carry on until you've added hair to all of the sections you wish to. you don't have to add hair to all sections but it helps provide coverage for the wig base if you make your dreads fairly chunky this way. here's all the bits knotted up:
you're ready to steam/handroll/whatever your dreads. unknot one dread and make sure you get any flyaway bits for that section tucked back into the dread. twist and steam, continue for all sections. here's halfway through:
all steamed! this will do fine, you can leave it here if you like as you should have pretty good coverage and a good-looking dread wig:
however, i like to make some SEDs to attach to the wig to add some more of the accent colours. this also helps provide coverage at the back of the wig, where the hair is always thinner. you can use DEDs too, i used to but find that SEDs work better for me. DEDs work best if you're making a solid colour wig. some of the ones i used on this wig:
the brilliant thing about wig bases is that they're made of mesh, that you can sew/attach/knot all kinds of stuff into:
*tuts over state of nails*
attaching dreads - i used to sew my dreads onto the wig base. you can use rubber bands by rubber-banding new dreads onto either the loose hair or existing dreads. rubber bands are faster than sewing, but i don't believe they look as neat, lie as well or last as long. sewing is nice and secure but takes longer. but now i'm a TOTAL convert to cable ties. i buy them in discount stores, they are super fast and probably the most secure method of attaching stuff to a wig base.
so, thread a cable tie through the wig base mesh:
thread the SED onto the cable tie, loop up the cable tie:
pull cable tie tight and snip off the end:
done! carry on with all your dreads. i hold up the wig inbetween attaching dreads to make sure i'm getting the colours fairly even or covering up any thinner parts of the overall wig. it usually involves lots of squinting and will probably give me wrinkles.
you can also poke plastics/ribbons etc through the mesh and knot them off:
ta-daa! you now have a wig with a good thick coverage of dreads plus a few accents for interest. tidy up the fringe and loose hair, snip off a few scraggly ends and you should be done:
but i like to add a few foam and plastic bits'n'bobs to the back of a-lines just to emphasise the shape.
get a few strips of foam and short lengths of plastic/rexlace/tubing together:
i then attach these in bundles to the back of the wig in exactly the same method that i use for dreads using cable ties, except i don't snip off the end of the cable tie itself, as it provides a lovely spikey bit!
so this is my finished piece:
side:
back showing foam etc better:
hope you all give it a go and post pics in the wig forum


